Everything comes to an end, and this will be the last part of this tutorial. Or at least, the last planned part of this tutorial. In this part, we will implement the support to functions. But, before we start, I need to correct a mistake in part IV of this tutorial, when the SVG output was implemented for the backward command. I forgot to change a signal for the X-axis coordinate. Follows the correction.
      case LogoLexer.Back:
      {
          var value = Parameter(0).Value(turtle);
          var pos = turtle.Position;
          var target = new Point(pos.X - MathF.Cos(turtle.Rotation) * value,
              pos.Y + MathF.Sin(turtle.Rotation) * value);
          if (turtle.IsDrawing) turtle.AddLine(pos, target);
          turtle.Position = target;
          break;
}We will follow the usual approach, defining new tokens in the lexer, the new rules in the parser, creating the visitors to build the abstract syntax tree, and the actuators to interpret the new tree. This will be a fun ride.
As discussed above, this is the last part of the tutorial. Nevertheless, I had fun writing this tool, and plan to maintain it in my free time. Thus, a new branch, named antlr-tutorial will be created to store the code written up now.
The main branch will be used to keep the development of this tool, and I might add new commands and features. Only the future will say.
While I did not receive any feedback from readers of this blog, I am still interested in it. Please feel free to comment or drop me a line. Also, if you are interested, clone the project and create a new feature. I will be happy to review your pull request and merge it.
The Lexer
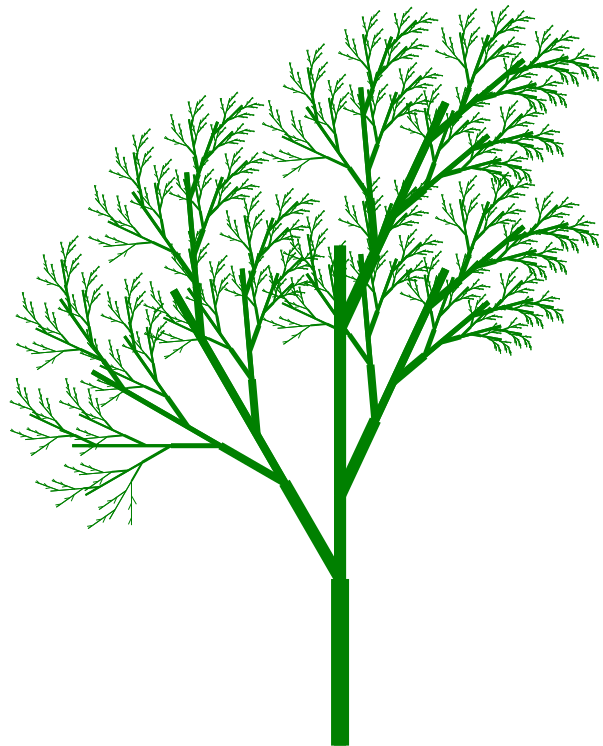
To define functions there are two required keywords: to and end. We also need to recognize function names. Another keyword, named stop, will also be implemented. It is useful to define recursive functions, like the one I used to create the tree featured in the image above.
We will consider that function names consist of letters and the underscore character only. Follows the new lexer rules. Note that the stop token was renamed as StopTk, as the stop word is used by the ANTLR objects.
To           : T O ;
End          : E N D ;
StopTk       : S T O P ;

Literal : [a-zA-Z_]+ ;⚠️ Important Note: The Literal rule needs to be defined at the end of the lexer file, after all the other commands. If this order is not kept, other built-in commands will be interpreted as method invocations.
The Parser
The parser changes are also simple. The stop command will be included in the atomicCmd rule. We will also add two new branches in the command rule to support method declaration and method invocation.
command : (simpleCommand | colourCmd | controlStmt)  #basicCommand
        | SetPos squarePoint                         #setPosition
        | SetXY simplePoint                          #setPosition
        | cmd=(Home|Bye|PenDown|PenUp)               #atomicCmd
        | cmd=(Home|Bye|PenDown|PenUp|StopTk)        #atomicCmd
        | Arc expr expr                              #arc
        | Make Variable expr                         #setVariable
        | Name expr Variable                         #setVariable
        | Show expr                                  #show
        | To Literal VariableRef* command+ End       #defineMethod
        | Literal expr*                              #customCommand
;Explaining the two last lines. A method declaration starts with the to token, followed by the method name. A list (possibly empty) of variable references follows the method name. After this, there is the list of commands inside the method declaration. All this finishes with the end keyword. The method invocation is simple, is just the literal that represents the method name, and the list of parameters.
Building the AST
To build the Abstract Syntax Tree we need to start by defining the node-type that will hold the method information. As usual, it will be a subclass of the Parameter class:
namespace Logo2Svg.AST;

public class Method : Parameter
{
    private readonly string _name;
    private readonly int _arity;
    private readonly List<string> _parameters;
    public Program Code { get; }

    public Method(string name, List<string> parameters, List<Command> program)
    {
        _name = name;
        _parameters = parameters;
        _arity = _parameters.Count;
        Code = new Program(program);
    }

    public string Name => $"{_name.ToLowerInvariant()}/{_arity}";

    public override float Value(Turtle turtle)
        => throw new NotImplementedException();

    public void Execute(Turtle turtle, List<INode> parameters)
        => throw new NotImplementedException();
}We will get back to this class to implement the Execute method. For now, let’s just define what we need to store, and create the constructor. We also create an accessor for the method name, that returns the name in lowercase, followed by the number of parameters the method handles. THis allows us to have methods with the same names and a different number of parameters. and a simple stringification function for debugging purposes. We will store the name of the method, the number of parameters, the name of the parameters and the code that gets executed. Nothing fancy.
The visitors will be quite similar to the existing ones, as shown below:
public override INode VisitDefineMethod(LogoParser.DefineMethodContext context)
{
    var args = context.VariableRef().Select(x => x.GetText()).ToList();
    var name = context.Literal().GetText();
    var code = context.command().Select(Visit<Command>).ToList();
    return new Command(LogoLexer.To, context.To().GetText(), new Method(name, args, code));
}

public override INode VisitCustomCommand(LogoParser.CustomCommandContext context)
    => new Command(-1,
                   context.Literal().GetText(),
context.expr().Select(Visit<INode>).ToArray());For defining a method, nothing new. We create a list of the declared parameters, we get the method name, and the list of commands. The method object is created and stored in a new command. The usual.
For the method invocation, we have code similar to any other command invocation. The only difference is that we are using a negative identifier, to guarantee it does not collide with the tokens defined by the ANTLR parser. Other than that, we store the name of the method and the parameters, as usual.
Execution
For the code execution, we need to start with some new code. When methods are executed, the parameter names override the existing variables that might exist with the same name. Thus, we need a new approach to store variable values. We need scopes! A scope is just a new layer of variables, that is created when a method is invoked and destroyed when the method returns.
To implement this behaviour, the dictionary we use to store variable names will be replaced by a stack of dictionaries, and two methods will be created, one for opening a scope, and another to close it.
First, rewriting the existing code. The existing _symbolTable variable gets replaced by the new _state variable, that is a stack of symbol tables. Every time a new scope is open, a new symbol table is created, and stored at the top of the stack. Whenever the scope ends, that layer is discarded.
Thus, in the turtle constructor, we need to create the global layer (stored at the bottom of the stack). To define a variable, we add the Peek() call to retrieve the top layer of the stack.
private readonly Stack<Dictionary<string, float>> _state = new();

public Turtle()
{
    _state.Push(new Dictionary<string, float>());
    Reset();
}

public void DefineVariable(string varName, float value)
    => _state.Peek()[varName] = value;

public bool RetrieveVariable(string varName, out float value)
=> _state.Peek().TryGetValue(varName, out value);To start a new scope, we create a new dictionary, copying the data from the top stack layer. Exiting a scope is simpler, just removing the top layer.
public void EnterScope() => _state.Push(new Dictionary<string, float>(_state.Peek()));

public void ExitScope() => _state.Pop();Finally, we need a dictionary to store the defined methods. The behaviour is similar to the previous symbol table, as we do not need scopes. We store the method name in lowercase, so we need to retrieve it in lowercase as well.
private readonly Dictionary<string, Method> _methodTable = new();

public bool RetrieveMethod(string name, int arity, out Method method)
    => _methodTable.TryGetValue($"{name.ToLowerInvariant()}/{arity}", out method);

public void DefineMethod(Method method) => _methodTable[method.Name] = method;The handling of the new commands for execution is performed by our existing switch statement, adding the following new cases:
  switch (Id)
  {
      case -1:
          if (turtle.RetrieveMethod(Name, Params.Count, out var method))
              method.Execute(turtle, Params);
          else
              throw new Exception("Command not defined");
          break;
      case LogoLexer.To:
          turtle.DefineMethod(Parameter<Method>(0));
          break;
      case LogoLexer.StopTk:
          throw new LogoStopException();
The first case handles the user-defined methods. We retrieve the method and, if it exists, we execute it. If it doesn’t, we just complain about it. For the method definition, we just store the method in our methods table. The last case is the weirdest, I know. To handle the stop command we will be throwing a custom exception, that will be caught and handled by the method execution code. A simple and, I hope, creative solution.
To be able to use the exception we need to create it. You can create it in an independent file. I decided to add it in this same file:
public class LogoStopException : Exception
{
}And finally, we can implement the execution method in the Method.cs file. In the end, it looks quite simple.
public void Execute(Turtle turtle, List<INode> parameters)
{
    var args = parameters.Cast<Parameter>().Select(x => x.Value(turtle)).ToList();
    turtle.EnterScope();

    foreach (var (name, value) in _parameters.Zip(args, (a, b) => (a, b)))
    {
        turtle.DefineVariable(name, value);
    }

    try
    {
        Code.Execute(turtle);
    }
    catch (LogoStopException)
    {
        // recover
    }
    finally
    {
        turtle.ExitScope();
    }
}Let’s go line by line. First, we evaluate the arguments that were passed to us. We cast each parameter, evaluate using the Value method, and convert everything to a list of float values.
Then, we open a new scope, so we can define local variables without losing the previously existing ones.
The foreach loop looks complicated, as I decided to use the Zip method from linq. It takes two lists and zips them as a zipper, one at a time. But you can define a method of what to do with each two elements of the two lists. In this case, we are returning a pair with those two elements. So, in the end, we are iterating over a list of pairs: the name of the parameter and its value. For each parameter, we define it in the symbol table.
Then, we evaluate the code, normally, as if it were the body of a loop. But this time, we wrap this invocation in a try/catch block. This way, if for some reason the method stops executing with the stop keyword, and our custom exception is rose, we catch the exception and just ignore it, keeping out our job.
In the end, we need to be sure to close our current scope.
Testing
To implement this behavior I ended up writing some tests. They do not add anything new to what I’ve been showing in the last parts of this tutorial. So, I decided not to include them in this post. You can still check them in the GIT repository.
But, for fun, here goes the code used to generate the featured image.
to tree :size :width
   make "old :width
   setpensize :width
   if :size < 5 [forward :size back :size stop]
   forward :size/3
   left 30 tree :size*2/3 :width*2/3 right 30
   forward :size/6
   right 25 tree :size/2:width*2/3 left 25
   forward :size/3
   right 25 tree :size/2:width*2/3 left 25
   forward :size/6
   back :size
    setpensize :old
end
setpencolor [ 0 50 0 ]
tree 500 18